archiveDec 31, 2021
Cloud service vulnerability analysis 1: CloudGoat lab setup
Install Rhino Security Labs CloudGoat, create an admin IAM user for lab control, and wire AWS CLI plus CloudGoat profile/whitelist config.
Cloud service vulnerability analysis 1
This series uses Rhino Security Labs CloudGoat as a deliberately vulnerable AWS playground for cloud security practice.
Lab environment
Required packages
- Linux or macOS (Windows is not officially supported)
- Argument tab-completion needs bash 4.2+ (Linux, or macOS with some friction)
- Python 3.6+
- Terraform >= 0.14 on your
$PATH
Install Terraform | Terraform - HashiCorp Learn
- The AWS CLI on your
$PATH, plus an AWS account with enough rights to create and destroy lab resources - jq
Install
$ git clone https://github.com/RhinoSecurityLabs/cloudgoat.git
$ cd cloudgoat
$ pip3 install -r ./core/python/requirements.txt
$ chmod u+x cloudgoat.py
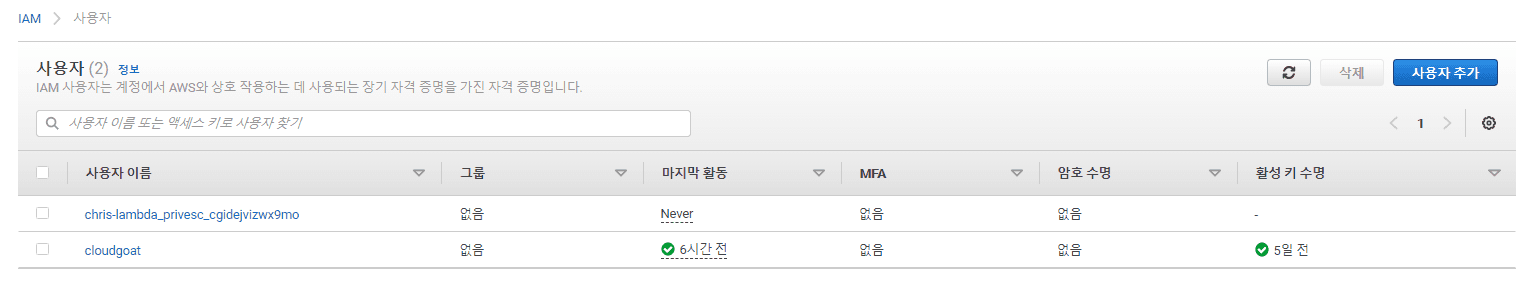
Create an IAM user with full admin rights for the lab controller so CloudGoat can stand up and tear down its scenarios.
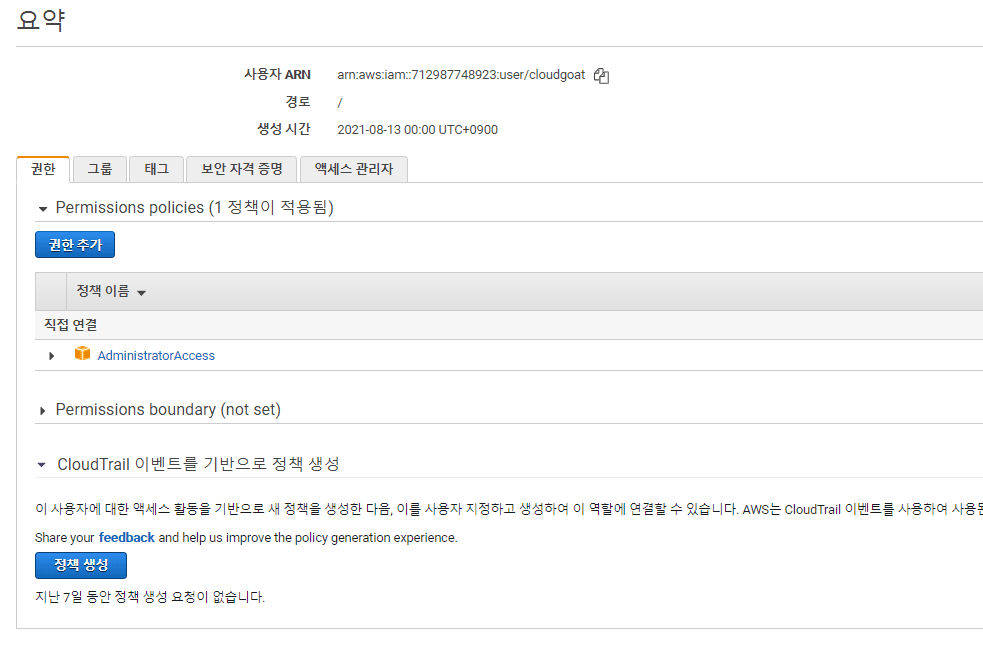
Attach AdministratorAccess, save the access key and secret, then configure an AWS CLI profile:
$ aws configure --profile cloudgoat

cat ~/.aws/credentials
[cloudgoat]
aws_access_key_id = <ACCESS_KEY>
aws_secret_access_key = <ACCESS_SECRET_KEY>
cat ~/.aws/config
[cloudgoat]
region = us-east-1
After those files exist, hand the same profile to CloudGoat and finish setup:
$ ./cloudgoat.py config profile
$ ./cloudgoat.py config whitelist --auto